Difference between revisions of "Equipment"
(→Hardware: Added firmware info for the v3 firmware) |
(→Hardware) |
||
| Line 161: | Line 161: | ||
{| cellpadding="15" cellspacing="0" border="1" | {| cellpadding="15" cellspacing="0" border="1" | ||
|- | |- | ||
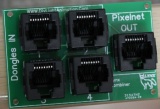
| − | |width=" | + | |width="25%"|<center>'''Pixelnet EtherDongle'''</center>[[Image:ED25Finalrr.jpg|right|thumb|160px]] |
*[[EtherDongleUse| Function & Use]] | *[[EtherDongleUse| Function & Use]] | ||
*[[Manual EtherDongle|Assembly Manual v1]] | *[[Manual EtherDongle|Assembly Manual v1]] | ||
| Line 177: | Line 177: | ||
<font color="red">'''NOTE: DON'T USE THE 49.9K RESISTORS FROM THE FIRST COOP, RJ IS GETTING REPLACEMENTS. THEY SHOULD BE 49.9 OHM'''</font> | <font color="red">'''NOTE: DON'T USE THE 49.9K RESISTORS FROM THE FIRST COOP, RJ IS GETTING REPLACEMENTS. THEY SHOULD BE 49.9 OHM'''</font> | ||
| − | |<center>'''Lynx Conductor'''</center> | + | |width="25%"|<center>'''Lynx Conductor'''</center> |
<center>'''EtherDongle Daughter Board'''</center>[[Image:rr.jpg|right|thumb|160px]] | <center>'''EtherDongle Daughter Board'''</center>[[Image:rr.jpg|right|thumb|160px]] | ||
*[[ConductorUse| Function & Use]] | *[[ConductorUse| Function & Use]] | ||
| Line 187: | Line 187: | ||
'''NOTE:''' Only use the Pickit (3) utility and not MPLAB to program the firmware | '''NOTE:''' Only use the Pickit (3) utility and not MPLAB to program the firmware | ||
| − | |<center>'''Pixelnet USB Dongle'''</center>[[Image:Lynx_DMX_Dongle_v2.0_-_Assembled.JPG|right|thumb|160px]] | + | |width="25%"|<center>'''Pixelnet USB Dongle'''</center>[[Image:Lynx_DMX_Dongle_v2.0_-_Assembled.JPG|right|thumb|160px]] |
*[[USBPixelnetDongleUse| Function & Use]] | *[[USBPixelnetDongleUse| Function & Use]] | ||
*[[Dongle_Manual_v2|Assembly Manual v2]] | *[[Dongle_Manual_v2|Assembly Manual v2]] | ||
| Line 202: | Line 202: | ||
*[http://diylightanimation.com/index.php?action=dlattach;topic=3554.0;attach=6342 '''Vixen ver 2.1 Pixelnet output plugin'''] | *[http://diylightanimation.com/index.php?action=dlattach;topic=3554.0;attach=6342 '''Vixen ver 2.1 Pixelnet output plugin'''] | ||
*[http://diylightanimation.com/index.php?action=dlattach;topic=6727.0;attach=7247 '''Vixen ver 2.5 Pixelnet output plugin'''] | *[http://diylightanimation.com/index.php?action=dlattach;topic=6727.0;attach=7247 '''Vixen ver 2.5 Pixelnet output plugin'''] | ||
| + | | | ||
|- | |- | ||
| − | |width=" | + | |width="25%"|<center>'''PixelNet 16 Port Active Hub'''</center>[[Image:Hub-Finished2.jpg|right|thumb|160px]] |
*[[ActiveHub16Use| Function & Use]] | *[[ActiveHub16Use| Function & Use]] | ||
*[[Manual SSHub|Assembly Manual v1]] | *[[Manual SSHub|Assembly Manual v1]] | ||
| Line 218: | Line 219: | ||
:<font color="red">'''Failure to add the extra power connectors can/will damaged the PS 24 pin Connector and Hub from excess current'''</font> | :<font color="red">'''Failure to add the extra power connectors can/will damaged the PS 24 pin Connector and Hub from excess current'''</font> | ||
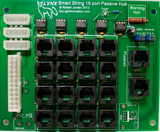
| − | |width=" | + | |width="25%"|<center>'''Pixelnet 16 Port Passive Hub'''</center>[[Image:Sm-Hub-Finish.jpg|right|thumb|160px]] |
*[[PassiveHub16Use| Function & Use]] | *[[PassiveHub16Use| Function & Use]] | ||
*[[Manual_PassiveHub16|Assembly Manual v1]] | *[[Manual_PassiveHub16|Assembly Manual v1]] | ||
| Line 226: | Line 227: | ||
:<font color="red">'''Failure to add the extra power connectors can/will damaged the PS 24 pin Connector and Hub from excess current'''</font> | :<font color="red">'''Failure to add the extra power connectors can/will damaged the PS 24 pin Connector and Hub from excess current'''</font> | ||
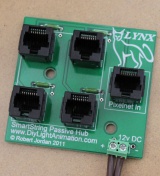
| − | |width=" | + | |width="25%"|<center>'''Pixelnet 4 Port Passive Hub'''</center>[[Image:Port4.JPG|right|thumb|160px]] |
*[[PassiveHub4Use| Function & Use]] | *[[PassiveHub4Use| Function & Use]] | ||
*[[Manual_PassiveHub|Assembly Manual v1]] | *[[Manual_PassiveHub|Assembly Manual v1]] | ||
*[http://www.mouser.com/ProjectManager/ProjectDetail.aspx?AccessID=1fae9536c0 Mouser Direct] | *[http://www.mouser.com/ProjectManager/ProjectDetail.aspx?AccessID=1fae9536c0 Mouser Direct] | ||
| + | | | ||
|- | |- | ||
| − | |<center>'''Smart String Controller'''</center>[[Image:SSC-Finished.jpg|right|thumb|160px]] | + | |width="25%"|<center>'''Smart String Controller'''</center>[[Image:SSC-Finished.jpg|right|thumb|160px]] |
*[[SSCUse| Function & Use]] | *[[SSCUse| Function & Use]] | ||
*[[Manual SSC|Assembly Manual v1]] | *[[Manual SSC|Assembly Manual v1]] | ||
| Line 248: | Line 250: | ||
'''To configure SSC''' [http://diylightanimation.com/index.php?action=dlattach;topic=3554.0;attach=6366 SS Utility] | '''To configure SSC''' [http://diylightanimation.com/index.php?action=dlattach;topic=3554.0;attach=6366 SS Utility] | ||
| − | |<center>'''Smart String Controller V2'''</center>[[Image:Sm-nSSC-Finish.jpg|right|thumb|160px]] | + | |width="25%"|<center>'''Smart String Controller V2'''</center>[[Image:Sm-nSSC-Finish.jpg|right|thumb|160px]] |
*[[SSC2Use| Function & Use]] | *[[SSC2Use| Function & Use]] | ||
*[[Manual_SSC2|Assembly Manual v2]] | *[[Manual_SSC2|Assembly Manual v2]] | ||
| Line 260: | Line 262: | ||
'''To configure SSC''' [http://diylightanimation.com/index.php?action=dlattach;topic=3554.0;attach=6366 SS Utility] | '''To configure SSC''' [http://diylightanimation.com/index.php?action=dlattach;topic=3554.0;attach=6366 SS Utility] | ||
| − | |<center>'''Smart String Controller V3'''</center>[[Image:rr.jpg|right|thumb|160px]] | + | |width="25%"|<center>'''Smart String Controller V3'''</center>[[Image:rr.jpg|right|thumb|160px]] |
*[[SSC3Use| Function & Use]] | *[[SSC3Use| Function & Use]] | ||
*[[Manual_SSC3|Assembly Manual v3]] | *[[Manual_SSC3|Assembly Manual v3]] | ||
| Line 281: | Line 283: | ||
'''To configure SSC''' [http://diylightanimation.com/index.php?action=dlattach;topic=3554.0;attach=6366 SS Utility] | '''To configure SSC''' [http://diylightanimation.com/index.php?action=dlattach;topic=3554.0;attach=6366 SS Utility] | ||
| − | |<center>'''Dumb String Controller'''</center>[[Image:DSC_beta_160.JPG|right|thumb|160px]] | + | |width="25%"|<center>'''Dumb String Controller'''</center>[[Image:DSC_beta_160.JPG|right|thumb|160px]] |
*[[DSCUse| Function & Use]] | *[[DSCUse| Function & Use]] | ||
*[[Manual_DSC|Assembly Manual]] | *[[Manual_DSC|Assembly Manual]] | ||
| Line 306: | Line 308: | ||
Flash you SSC with the new firmware. The same firmware now works on both controller versions. | Flash you SSC with the new firmware. The same firmware now works on both controller versions. | ||
| − | |<center>'''Lynx Combiner'''</center>[[Image:IMG_4689.JPG|right|thumb|160px]] | + | |width="25%"|<center>'''Lynx Combiner'''</center>[[Image:IMG_4689.JPG|right|thumb|160px]] |
*[[CombinerUse| Function & Use]] | *[[CombinerUse| Function & Use]] | ||
*[[Manual_Combiner|Assembly Manual v1]] | *[[Manual_Combiner|Assembly Manual v1]] | ||
Revision as of 20:11, 23 September 2012
Smart String / Pixelnet Section
Nodes(Lights) Info & Order Chart
| Light type | Input Side | Max # per SSC
|
Approx Amps
|
Links to purchase online
| ||||
Smart String Nodes
|
Big Chip Side of Node | 3.7975
|
25ct String
|
50ct String
|
75ct String
|
100ct String
|
128ct String
| |
(Metal Backed) 3 50/50 Nodes
|
DI | 3.96
|
Square | |||||
(Plastic rectangle) 50/50 Nodes
|
DI | 4.16
|
Rectangle (Center Spacing 4.7", Wire between each 3.9", Total 7.8') | |||||
Rigid strips 30 50/50 Nodes
|
Male 3 pin connector | Not Known Yet | Rigid | |||||
Flexible strips 13ft 50/50 nodes
|
Arrows show direction | approx 3.96
|
Flexible | |||||
| Accessories → | 3 Conductor Cable | 3 Conductor Connectors | ||||||
| Cat5e Cable | ||||||||
String Controller Pipe Size Chart
| Device | Pipe | Cap | Purchase Info |
| Pixelnet Smart String Controller (SSC) | 1 inch 200 PSI PVC / Sch 20 | Also, 1inch PVC Sch 40 CAP
|
|
| Pixelnet Dumb String Controller (DSC) | 200 PSI PVC / Sch 20 |
Library
| Documents |
| |
Videos
|
||
Software
|
| |
| Academy info - pdfs, links and more |
| Diagrams | |||
Hardware
NOTE: Only use the Pickit 3 utility and not MPLAB to program the firmware NOTE: DON'T USE THE 49.9K RESISTORS FROM THE FIRST COOP, RJ IS GETTING REPLACEMENTS. THEY SHOULD BE 49.9 OHM |
File:Rr.jpg 160px
NOTE: Only use the Pickit (3) utility and not MPLAB to program the firmware |
NOTE: Only use the Pickit (2 or 3) utility and not MPLAB to program the firmware
|
|||||||
NOTE: Only use the Pickit (2 or 3) utility and not MPLAB to program the firmware
|
|
||||||||
NOTE: Only use the Pickit (2 or 3) utility and not MPLAB to program the firmware
|
NOTE: Only use the Pickit (2 or 3) utility and not MPLAB to program the firmware
|
File:Rr.jpg 160px
NOTE: Only use the Pickit (2 or 3) utility and not MPLAB to program the firmware
|
NOTE: Only use the Pickit (2 or 3) utility and not MPLAB to program the firmware | ||||||
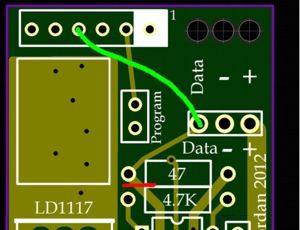
| V3 firmware can also be used on V1 & V2 SSC controllers with the following modification
On the following image you will see two colored in lines I painted on to a image of the top of a SSC. This mod was designed to be totally on the top of the PCB to allow those with their SSCs already enclosed in the PVC to do this easily. Just slide the PCB up out of the PVC as if you were going to update the firmware, which you are going to do also. It does not matter if it is a V1 or V2 PCB this mod is exactly the same. The red mark is where you need to use a razor blade and cut the trace where it is. This is on the TOP of the PCB where the parts are. You will find the heavier trace located between the pins of the two resistors. Make sure you cut it well enough that it does not make connection any longer. Then on the back of the PCB place a jumper wire where the Green line is drawn. Connect these points with a small light wire making sure it does not short anything else. Remember to take into account that when you flip the pcb over to do this that every is mirror imaged on you. Once this is complete you may want to change the top resistor to in the range of 220 - 330 ohms. It will work with others that we have used but you will find this to be the best area to use. Flash you SSC with the new firmware. The same firmware now works on both controller versions. |
|||||||||
DMX Section
Hooking up a DMX Universe
- Hookup Diagrams showing DMX devices connected to a computer.
Equipment Errata
- This page is for mods needed on released production boards from DLA.
Controller (Dimmers) Comparison Table
| Controller | DMX | # Channels | On Board SSR | Wireless Pkg | LNT | Dimming | On Board Splitter | 12v DC | 120v AC | 240 AC |
| Lynx Express | Yes | 16 | Yes | EX/RX or RX | Yes | Yes | Yes (1)** | No | Yes | Yes |
| Lynx Freestyle | Yes | 128 | No/SSR4 | EX/RX wMod or RX | No | Yes | No | No | Yes | Yes |
| Lynx SSR4-DMX | Yes | 4 | Yes | EX/RX wMod or RX | No | Yes | No | No | Yes | No |
| Lynx MR-16 | Yes | 16 | LED/MR16 | EX/RX wMod or RX | No | Yes | No | Yes *** | No | No |
- Legend
- LNT = Light Normalizing Technology. With the proper curves all lights turn on and dim at the same rate.
- Need to know if Lynx hardware works in your region? Lynx Voltage Info
- Asterisk Notes
- ** Two DMX outputs using wired input (Cat5) with ver 3 pcb and higher or
- One DMX output (DMX Out2) if using the mounted EX/RX wireless module on ver 3 pcb and higher
- *** MR16 is capable of handling up to 24 volt DC source power. Please place a heat sink on the 5 volt regulator.
Cases Chart
| Lynx Device | Case Part# | Info | Purchase Info |
|
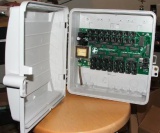
CG-1500 | Coax Demarcation Enclosure
|
|
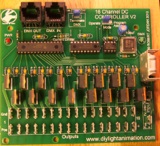
16 Channel DC Controller |
CG-500 | Coax Demarcation Enclosure
|
|
|
TA-200 | Coax Demarcation Enclosure
|
|
|
LP-35P | Choose Gray and put in the comments of the order
|
If you call they will ship USPS at a much cheaper rate than UPS |
|
LP-51P | Choose Gray and put in the comments of the order
|
If you call they will ship USPS at a much cheaper rate than UPS |
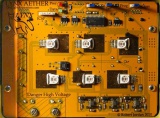
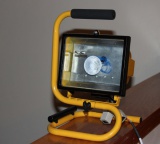
Flood Light - Aether
DMX LED RGBW Flood/Spot Light
Pronunciation on Aether:
- Ether \E"ther\ ([=e]"th[~e]r), n. [L. aether, Gr. a'iqh`r, fr. a'i`qein to light up, kindle, burn, blaze; akin to Skr. idh,
- indh, and prob. to E. idle: cf. F. ['e]ther.] [Written also [ae]ther.]
NOTE: Only use the Pickit (2 or 3) utility and not MPLAB to program the firmware
|
NOTE: Only use the Pickit (2 or 3) utility and not MPLAB to program the firmware
|
Dimmers
NOTE: Only use the Pickit (2 or 3) utility and not MPLAB to program the firmware |
NOTE: Only use the Pickit (2 or 3) utility and not MPLAB to program the firmware |
NOTE: Only use the Pickit (2 or 3) utility and not MPLAB to program the firmware
|
NOTE: Only use the Pickit (2 or 3) utility and not MPLAB to program the firmware |
DMX Wireless Devices
NOTE: Only use the Pickit (2 or 3) utility and not MPLAB to program the firmware
|
NOTE: Only use the Pickit (2 or 3) utility and not MPLAB to program the firmware |
DMX Devices
NOTE: Only use the Pickit (2 or 3) utility and not MPLAB to program the firmware
|
|
Aeon Clock
NOTE: Only use the Pickit (2 or 3) utility and not MPLAB to program the firmware |
Discontinued Hardware
NOTE: Only use the Pickit (2 or 3) utility and not MPLAB to program the firmware | ||
NOTE: Only use the Pickit (2 or 3) utility and not MPLAB to program the firmware |
NOTE: Only use the Pickit (2 or 3) utility and not MPLAB to program the firmware |
NOTE: Only use the Pickit (2 or 3) utility and not MPLAB to program the firmware |


